

Garden > Plants Problem
How to Recover Plants from Yellow Leaves, Soggy Soil, and Root Rot
Yellow leaves, soggy soil, and root rot are among the most common problems faced by home gardeners. Whether you grow plants indoors, on a balcony, or in a rooftop garden, these issues can quickly weaken a healthy plant if not addressed early. The good news is that many plants can recover if the problem is identified and treated promptly.
Understanding the Problem
Yellow leaves are often the first warning sign that something is wrong beneath the soil. While nutrient deficiencies, pests, or natural aging can cause yellowing, overwatering is one of the most common causes. When soil remains constantly wet, plant roots cannot access enough oxygen. As a result, roots begin to decay, leading to root rot.
Root rot is a serious condition caused by excessive moisture and poor drainage. Healthy roots should be firm and white or light-colored. Rotting roots become brown, black, soft, and may produce an unpleasant smell. Once roots start dying, the plant struggles to absorb water and nutrients, causing leaves to yellow, wilt, and eventually drop.
Signs Your Plant Has Root Rot
Before attempting recovery, it's important to confirm the problem.
Common symptoms include:
- Yellowing leaves throughout the plant
- Wilting despite wet soil
- Slow or stunted growth
- Mushy stems near the soil line
- Foul smell coming from the pot
- Black or brown roots
- Leaves dropping prematurely
If several of these signs appear together, root rot is likely the cause.
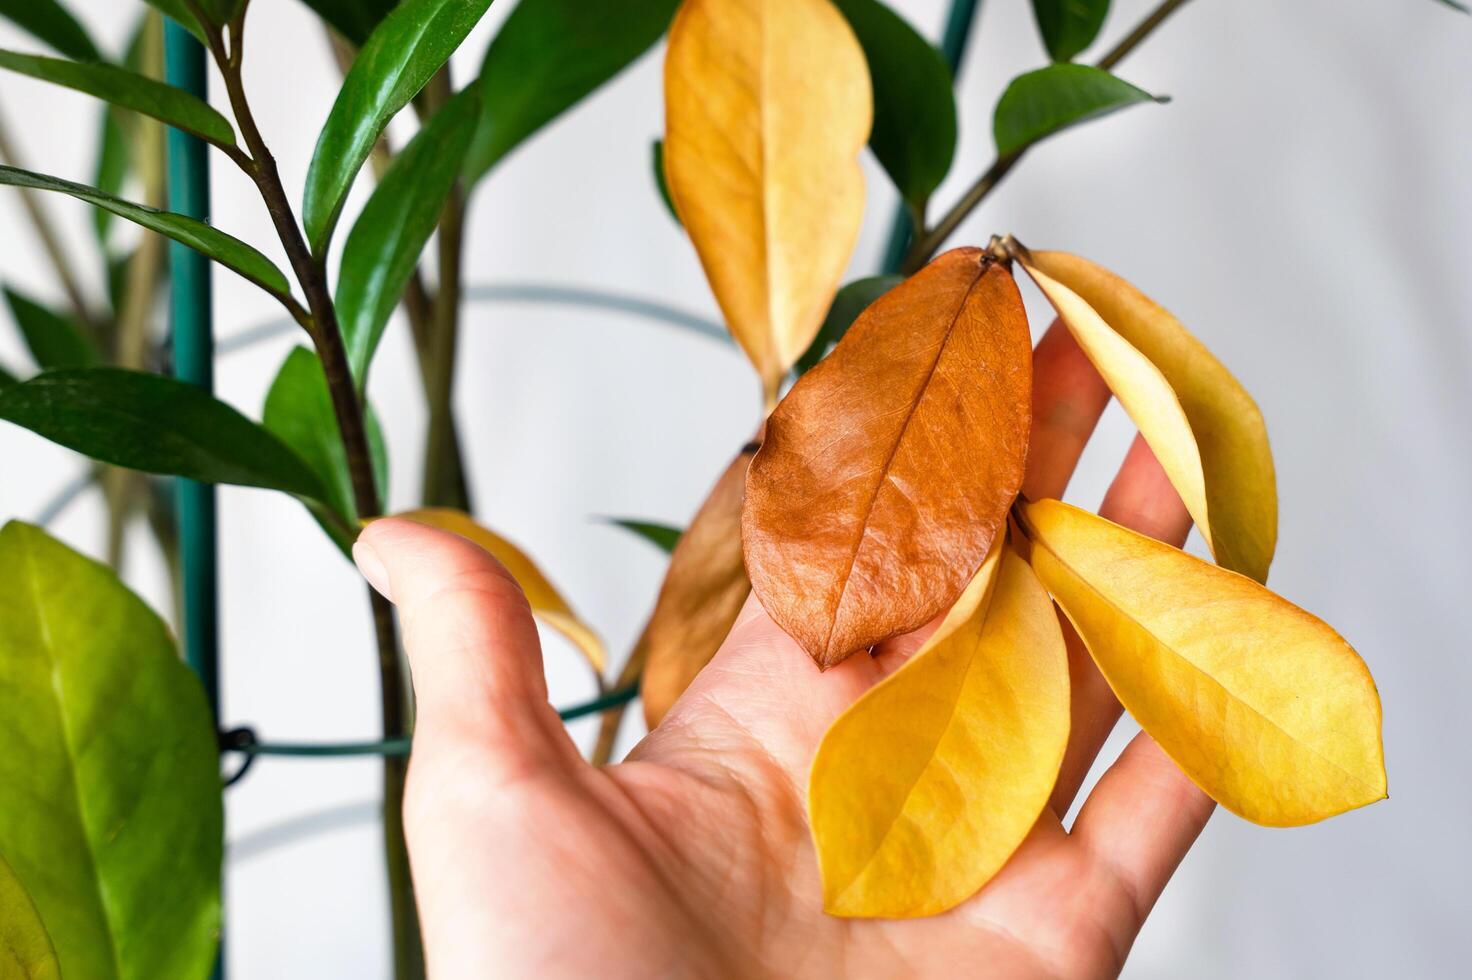 |
| Yellow leaves and waterlogged soil in a potted plant |
Step 1: Stop Watering Immediately
The first step in saving an overwatered plant is to stop adding more water.
Allow the soil to begin drying naturally. Continuing to water a plant with root rot only accelerates the damage. Move the plant to a location with good airflow and indirect sunlight to help excess moisture evaporate.
For outdoor and rooftop plants, protect them from heavy rain until the soil dries to a safer level.
Step 2: Inspect the Roots
If the plant's condition continues worsening, carefully remove it from the pot for inspection.
Gently shake away excess soil and examine the root system.
Healthy roots:
- White or cream-colored
- Firm and strong
Rotting roots:
- Brown or black
- Soft and mushy
- Foul smelling
This inspection helps determine how severe the damage has become.
Step 3: Remove Damaged Roots
Using clean, sterilized scissors or pruning shears, trim away all rotting roots. Do not leave any mushy or black roots attached, as they can continue spreading decay. After trimming, leave only healthy firm roots. Disinfect your tools afterward to avoid spreading disease to other plants. Removing damaged roots allows the plant to focus energy on new healthy growth.
Step 4: Replace the Old Soil
One of the biggest mistakes gardeners make is reusing infected soil. Old soggy soil often contains harmful fungi and bacteria that contribute to root rot. Prepare a fresh, well-draining potting mix. A good recovery mixture may include:
- Garden soil
- Compost
- Coco peat
- Perlite or coarse sand
This combination improves airflow around the roots and prevents future waterlogging.
 |
| Healthy Root Recovery – Fresh roots after trimming and repotting |
Step 5: Choose a Pot with Proper Drainage
Drainage is essential for recovery.
Always ensure the pot has multiple drainage holes at the bottom. Without proper drainage, excess water becomes trapped around the roots.
If your current container lacks adequate drainage, transfer the plant to a better pot immediately.
Clay pots are often helpful because they allow soil to dry faster than plastic containers.
Step 6: Water Correctly After Repotting
After repotting, water lightly to settle the new soil. Avoid soaking the plant. Wait until the top layer of soil becomes dry before watering again. Many plants recover best when the soil alternates between slightly moist and slightly dry rather than constantly wet.
The exact watering schedule depends on:
- Plant type
- Pot size
- Weather conditions
- Humidity levels
Always check the soil before watering instead of following a fixed schedule.
Step 7: Improve Air Circulation
Good airflow helps prevent fungal growth and encourages faster recovery.
For indoor plants:
- Open windows regularly
- Avoid overcrowding plants
- Use gentle air circulation if needed
For rooftop and balcony gardens:
- Space plants properly
- Avoid keeping pots tightly packed together
Better airflow reduces excess moisture around leaves and soil.
Step 8: Remove Yellow Leaves
Yellow leaves rarely turn green again. Pruning severely damaged leaves allows the plant to redirect energy toward healthy growth.
Remove:
- Completely yellow leaves
- Mushy stems
- Dead branches
However, avoid excessive pruning at one time because stressed plants still need some foliage for photosynthesis.
 |
| Plant Recovery – Healthy new green leaves after treatment |
Natural Remedies to Support Recovery
Several natural methods can help plants recover more effectively.
Cinnamon Powder
Cinnamon has natural antifungal properties. Lightly dusting trimmed roots with cinnamon may help reduce fungal activity.
Neem-Based Treatments
Neem products can help manage certain fungal problems and support overall plant health.
Compost Tea
Once recovery begins, diluted compost tea can provide gentle nutrients without overwhelming weakened roots.
Natural remedies should support recovery but not replace proper drainage and watering practices.
How Long Does Recovery Take?
Plant recovery depends on:
- Severity of root damage
- Plant species
- Environmental conditions
Mild overwatering problems may improve within a few weeks. Severe root rot can take several months for noticeable recovery. New healthy leaves are often the first sign that the plant is improving. Patience is important during the recovery period.
How to Prevent Root Rot in the Future
Prevention is much easier than treatment. Follow these simple habits:
- Water only when needed
- Use well-draining soil
- Choose pots with drainage holes
- Avoid standing water in saucers
- Check soil moisture before watering
- Improve air circulation
- Avoid oversized pots that hold excessive moisture
Developing proper watering habits is the most effective way to prevent root rot.
Best Plants for Beginners Concerned About Overwatering
Some plants tolerate occasional watering mistakes better than others.
Examples include:
- Snake Plant
- ZZ Plant
- Aloe Vera
- Jade Plant
These plants generally prefer drier conditions and are less likely to develop root rot when compared to moisture-loving species.
Conclusion
Yellow leaves, soggy soil, and root rot can be alarming, but they do not always mean a plant is beyond saving. By stopping excess watering, removing damaged roots, repotting into fresh well-draining soil, and improving drainage, many plants can recover successfully.
The key is early action. The sooner you address waterlogged soil and root problems, the better the chances of restoring healthy growth. With proper care, patience, and improved watering habits, your plant can often return to producing strong roots, vibrant green leaves, and healthy new growth.
Internal Linking Suggestions
- How to Water Houseplants Properly
- Best Plants for Rooftop Gardening
- Common Houseplant Problems and Solutions
- Organic Gardening Tips for Beginners
- How to Grow Healthy Plants in Containers
